
Veneers are a major step up from dental bonding, a popular cosmetic dentistry procedure that can also improve the look of your teeth. They can solve many of the same problems, such as chipped teeth, but they offer a much more natural-looking and durable solution.
Before getting veneers, your dentist will need to thoroughly examine your mouth to ensure that veneers are the best option for you. This is because veneers are not reversible, and they require some preparation of your natural teeth.
Preparation is crucial in ensuring that your veneers look as natural and seamless as possible.
Is Veneer Prep Painful
Veneer prep involves removing a small amount of enamel from your tooth. This is typically done with a dental drill. The amount of enamel removed is very minimal, and most people don’t report any significant pain or discomfort during the procedure. However, some people with sensitive teeth may feel some discomfort. If this is the case, your dentist can numb the area to help make you more comfortable.
Prepping should be comfortable, and you have nothing to worry about.
How Long Does It Take To Prepare Teeth For veneers?
Veneer prepping generally takes between 30 and 60 minutes per tooth. This preparatory work is done, so your veneers look natural and fit your smile well. The process involves lightly buffing the front and sides of your teeth to make room for the veneer’s thickness. Prepping is crucial, and the doctor will be careful not to remove too much tooth enamel. That’s why it may take some time to get multiple veneers.
Why Veneer prep Is Important
There are many benefits of veneer prepping. Below are some of the benefits.
Seamless blending
There is no point in having veneers if they’re going to look fake. The idea behind getting veneers is to improve the look of your smile, not to make it obvious that you’ve had work done. That’s why choosing a dentist who takes the time to prep your teeth correctly for veneers is important.
Veneers should look natural, which means they should match the color of your other teeth and blend in seamlessly. If your veneers are too white or dark, they will stand out and look fake. Veneers cannot be whitened so if you are planning on whiten your teeth, it is best to do before you do veneers to properly match your adjacent teeth.
Prepping your teeth will make sure your veneers look natural. The prep process includes shaping and contouring the teeth, so the veneers fit snugly and look like they belong.
Longevity
Proper veneer preparation can greatly increase the longevity of your veneers. By ensuring that your veneers are properly bonded to your tooth structure, you can help to prevent them from becoming loose or falling off. Also, proper preparation can help seal out bacteria and food particles that could cause decay underneath the veneers.
Therefore, prepping your teeth before getting veneers is important for your new smile’s aesthetic results and longevity.
Teeth are not uniform.
Every tooth is different in shape, size and thickness. This means that each tooth requires a different type of preparation or veneer prep. If your dentist does not take the time to prepare your teeth properly, your veneers may not fit properly or look natural.
Note that some teeth may require very little preparation, while others may need to be shaved down quite a bit. This all depends on the individual tooth and how much natural tooth structure needs to be removed to accommodate the veneer.
Veneer prepping will dictate the ultimate success of your smile makeover.
Smooth edges reduce stress on the restoration.
The edges of a veneer should be smooth to help reduce stress on the restoration. When restoration is placed under stress, it can cause the veneer to crack or break. Smooth edges also help to prevent staining and discoloration of the veneer.
The final restoration should match the contours of the tooth to provide a natural appearance. If you don’t prep, the final restoration may stress the veneer and cause it to break.
Prepping roughens the surface.
Roughening the enamel surface creates tiny pits that give the composite material something to grab onto, ensuring a stronger bond. It also helps to remove any residual stains that might be lurking on the tooth.
If you don’t prep the tooth correctly, the veneer won’t adhere as well and is more likely to come loose. In some cases, it can even cause the veneer to crack. The retention of the veneer will increase its longevity and stability of the veneer.
Provides room for the best results
Prepping gives the dentist space to work and achieve the best possible results for your smile.
Without prepping, your dentist would have a more difficult time getting accurate measurements and shaping your veneers. This could lead to longer procedures, more discomfort, and less-than-ideal results.
It allows the dentist to adjust the veneers’ size, shape, and thickness. They can’t do this as easily if the tooth isn’t prepped. The dentist can do whatever is necessary to ensure the veneers fit perfectly and look great.
The Veneer preparation Process
Cleaning
Your teeth will be thoroughly cleaned before the veneers are placed. This ensures that your mouth is healthy and free of any bacteria or other debris that could cause problems.
An Impression of your teeth
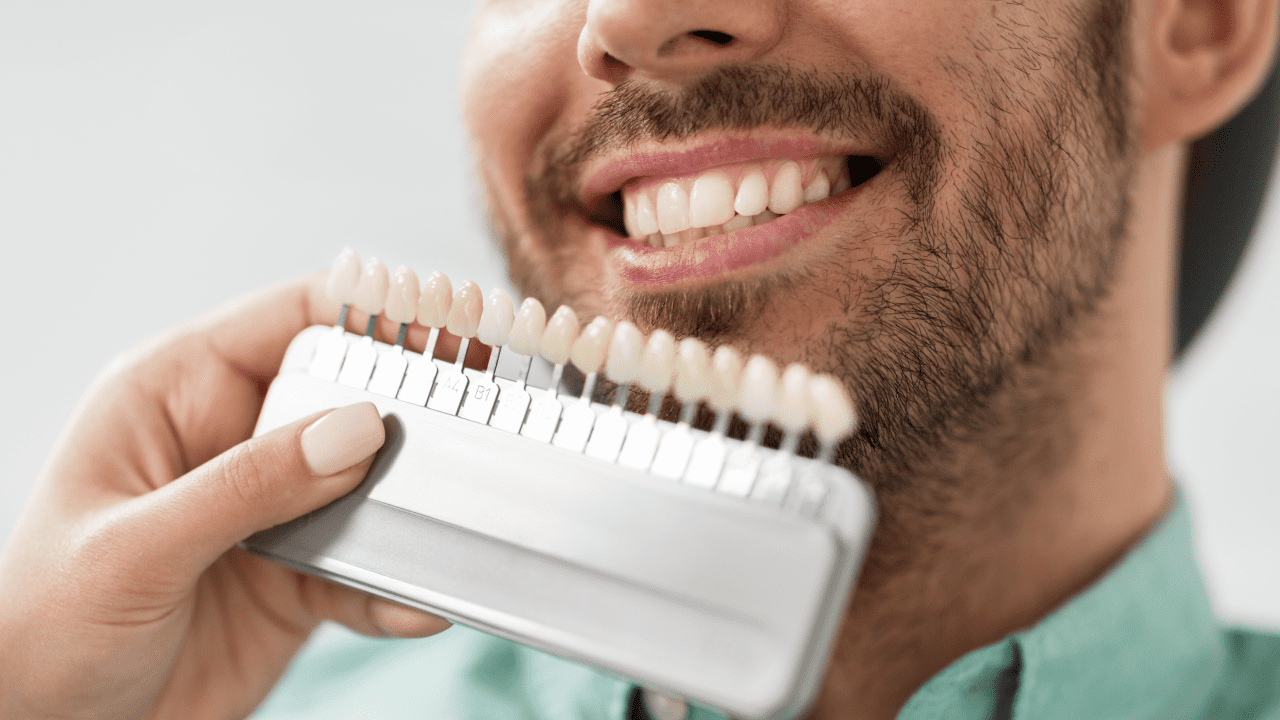
An impression of your teeth is taken to create a model from which your veneers will be made. This process is important to achieve your new smile’s proper fit, color, and shape.
The shade of your teeth has also matched the porcelain used in your veneers. This ensures that your new smile will look natural and blend in with your current teeth.
The impressions are sent to a dental laboratory where your veneers will be custom-made from porcelain after they are taken. It usually takes about two weeks to receive your new veneers back from the lab.
This is the stage where you should clearly say your preferences because this is the last chance to make changes before your veneers are made. Therefore, be sure to communicate any changes you want, such as the shape, size, or color of your veneers.
Tooth Trimming and shaping
Before veneer application, the tooth is trimmed and shaped to make room for the veneer. This process is usually done with a drill, though sometimes a laser may be used. It ensures that the veneer will fit comfortably on the tooth and look natural.
Local anesthesia may or may not be needed to numb the area around the tooth being worked on. Once you’re comfortable, your dentist will begin trimming away small amounts of enamel from your tooth. This process is usually not painful, but you may feel some pressure or vibration.
After trimming, your dentist will use a shaping tool to refine the tooth’s surface. Again, local anesthesia will keep you comfortable during this process. Once the shaping is complete, your tooth will be ready to receive the veneer.
The entire process usually takes one to two hours but may take longer, depending on the number of teeth being worked on.
Veneer application
Veneer application is usually on the second appointment. This is when the impression is ready, and the veneers are fabricated.
The process begins with the dentist confirming if the veneers’ shade matches the teeth. The dentist can’t continue the process if the shade is not matching.
Teeth disinfection
The dentist will then proceed to disinfect the teeth. This is a critical step as it helps to remove any bacteria that may be on the teeth. A special solution is used for this purpose.
Tooth preparation and installation
The tooth is etched and bonded, which mechanically and chemically helps bond the veneer to the front of the natural tooth. This process is not uncomfortable and is important for the durability and long-lasting properties of the veneer. A strong bonding agent is used to attach the veneers to the teeth. A special LED light is then used to harden the bonding agent. The doctor will also check to ensure that the veneers are properly aligned. They may ask you to bite on a special material to ensure proper alignment.
Aftercare
You will need to take extra care of your veneers. This means avoiding hard foods and using a special toothbrush. You should also avoid using your teeth to open bottles or bite your nails. Remember to floss regularly and visit the dentist for regular checkups.
Composite vs Porcelain Veneer Prep
Composite veneers don’t require as much preparation as porcelain veneers and can be done in one appointment. The enamel is cleaned, and bonding material is applied to the tooth. The tooth-colored composite material is then placed on the tooth and shaped to the desired look. A light is used to harden the composite material.
It doesn’t require as much tooth reduction as porcelain veneers. It’s the reason why it’s less expensive. Note that composite veneers don’t last as long as porcelain veneers and are more likely to discolor or fracture over time.
Porcelain veneers require more prep work. The enamel is removed (usually about 0.5 to 1mm) from the front and sides of the tooth. This may require local anesthesia. Then a mold or impression is made of the teeth and sent to a dental lab where the veneers will be made.
The porcelain veneers are bonded to the tooth with special cement. A light is used to harden the cement.
Porcelain veneers resist stains better than composite veneers and last longer. They’re also less likely to chip or crack than composite veneers. But they’re more expensive than composite veneers. Therefore, if you’re on a budget, composite veneers may be the better option for you.
It’s good to know the pros and cons of each type of veneer before making a decision. Your dentist can help you decide the best based on your needs and budget. Also, understand both procedures to make an informed decision. Your dentist should go over the risks and benefits of each type of veneer with you.
Can You Eat After Veneer prep?
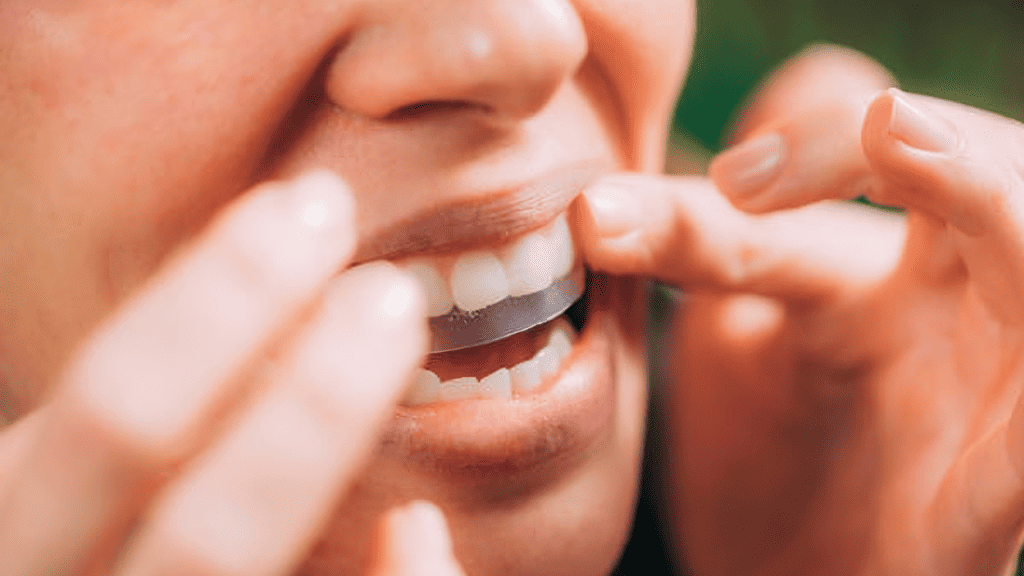
Yes, you can eat after veneer prepping! The dentist will install temporary veneers as you wait for your permanent set to be made. These are meant to protect your teeth and help you get used to the new feel of your smile.
You’ll probably want to stick to soft foods after prepping, however. Eating hard foods could damage your temporary veneers or irritate your gums. So enjoy some soup, mashed potatoes, or oatmeal for a few days until your permanent veneers are in!
Avoid foods with extreme temperatures, like ice cream or hot coffee. These can cause sensitivity in your teeth. And be careful with chewy foods, like caramels or gum. You don’t want to pull out your temporary veneers!
How long will teeth hurt after veneer prep
You may experience tooth sensitivity after your veneer preparation, but this is usually temporary. If you have any pain or discomfort, over-the-counter pain medication can help. The discomfort should go away within a few days. If it doesn’t, call your dentist.
Most people don’t feel any pain after their veneers are placed. Unless the temporary veneers are loose, you shouldn’t feel any discomfort.
However, the pain should go away in a few days after prepping for veneers. Don’t trigger the pain by being careless. Adhere to your dentist’s advice for the next few days.
Conclusion
Veneer prepping is a necessary step to get veneers. It’s not painful, but you may experience some sensitivity afterwards because teeth prepped for veneers have thin enamel. The best way to avoid pain is to follow your dentist’s instructions and take over-the-counter pain medication if necessary. Remember to eat soft foods and avoid extreme temperatures and chewy foods. Also, prepare adequately before the procedure by learning about the risks and benefits of each type of veneer. This way, you can make an informed decision about the best for you.
Related Articles
How Long Do Veneers last? Porcelain Vs Composite and Maintenance Guide

Marcus Ramsey has been a professional writer for over seven years. He has talked about and produced content for industries like Dentistry, Healthcare, and more.

Erica Anand is a certified dental expert. She holds a BA in Chemistry and a Doctorate of Dental Surgery from Stony Brook University. After completing a two-year pediatric dentistry program, she now runs a private practice focusing on preventive dentistry and is a member of the American Association of Dental Consultants.